|
pros- it was a creative way to include every member of the group. It showed each member art and drawing ability in one. It included all sports that we all play and enjoy cons- the sticky notes would tend to fall apart frequently and lose its stickiness. After a while the pencil markings would fade away. process- we each took a section and drew a series of moves that would end up in either shooting or passing the ball to the next person. http://www.youtube.com/watch?v=EaC16udTHrQ 
0 Comments
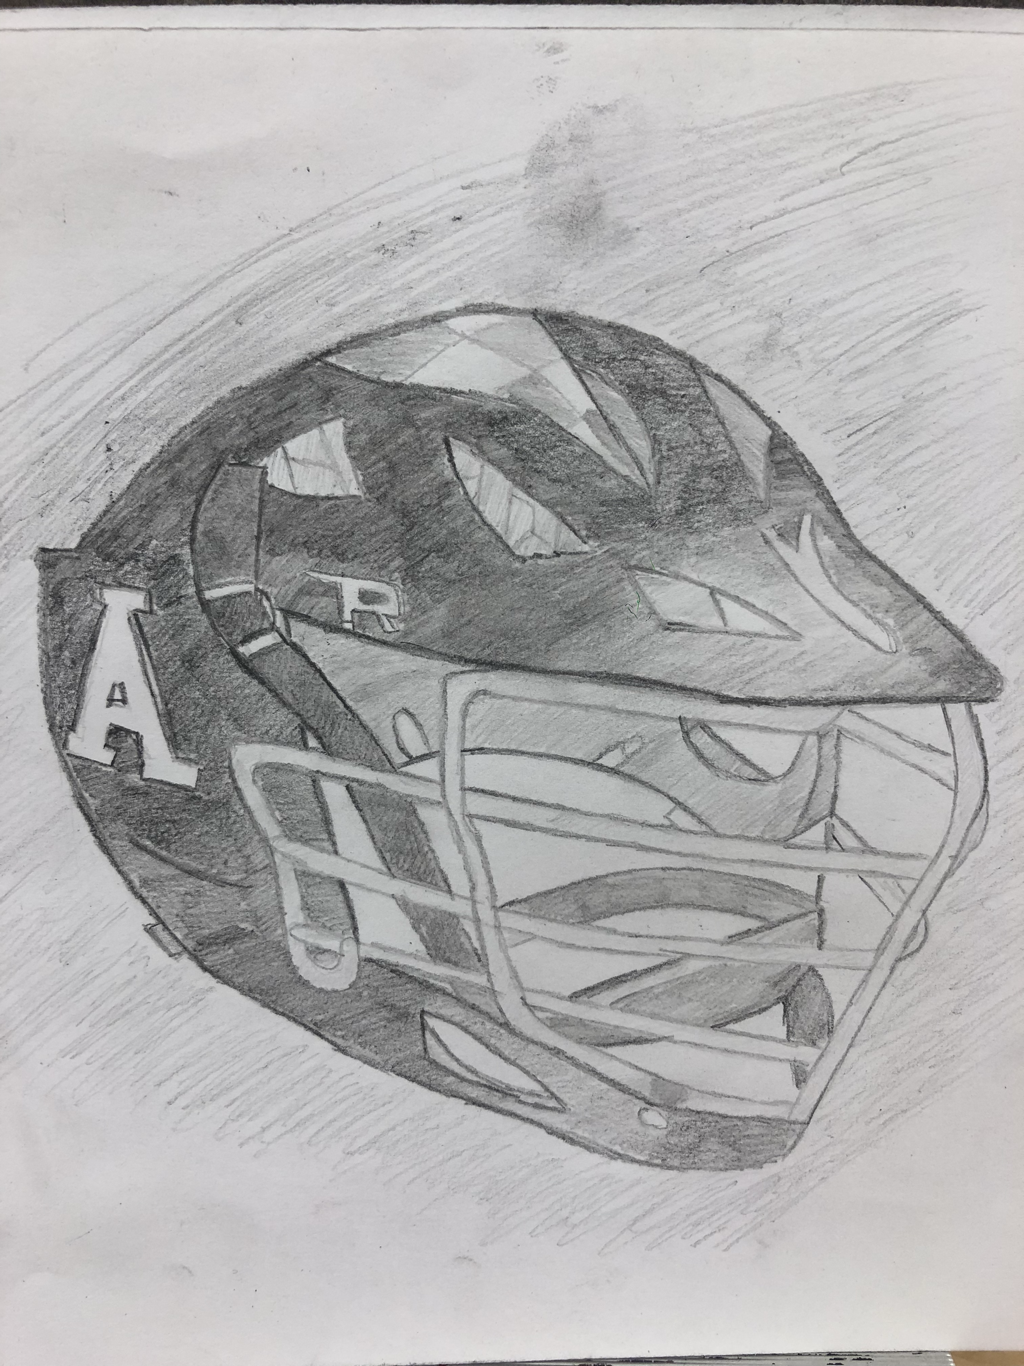
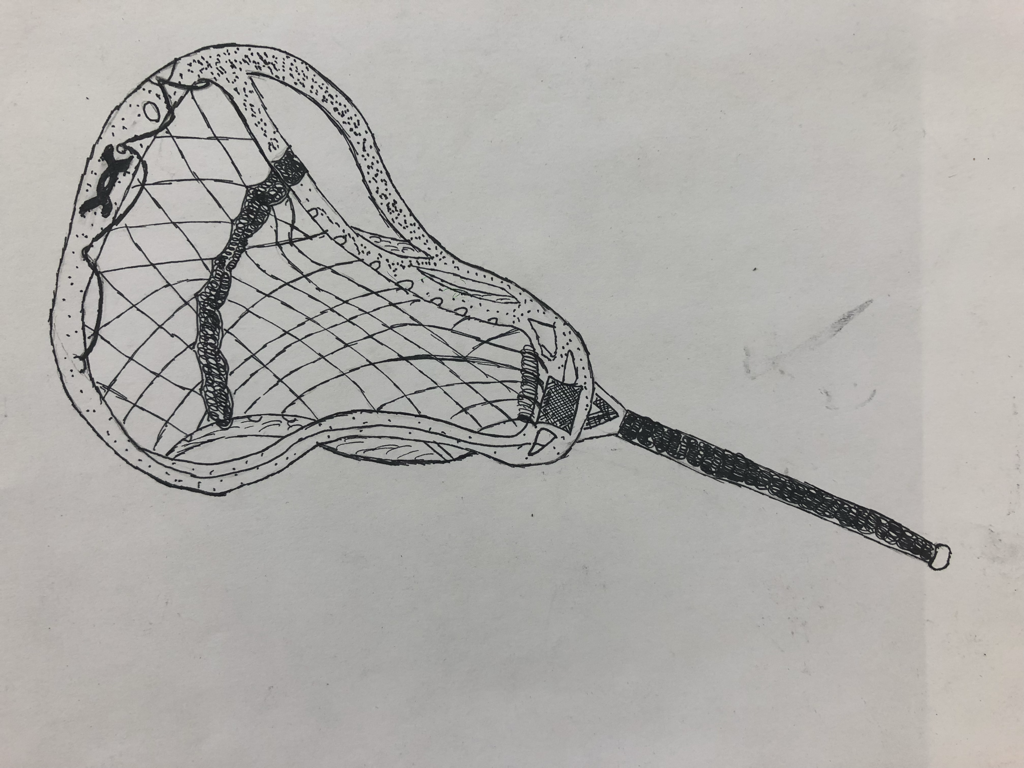
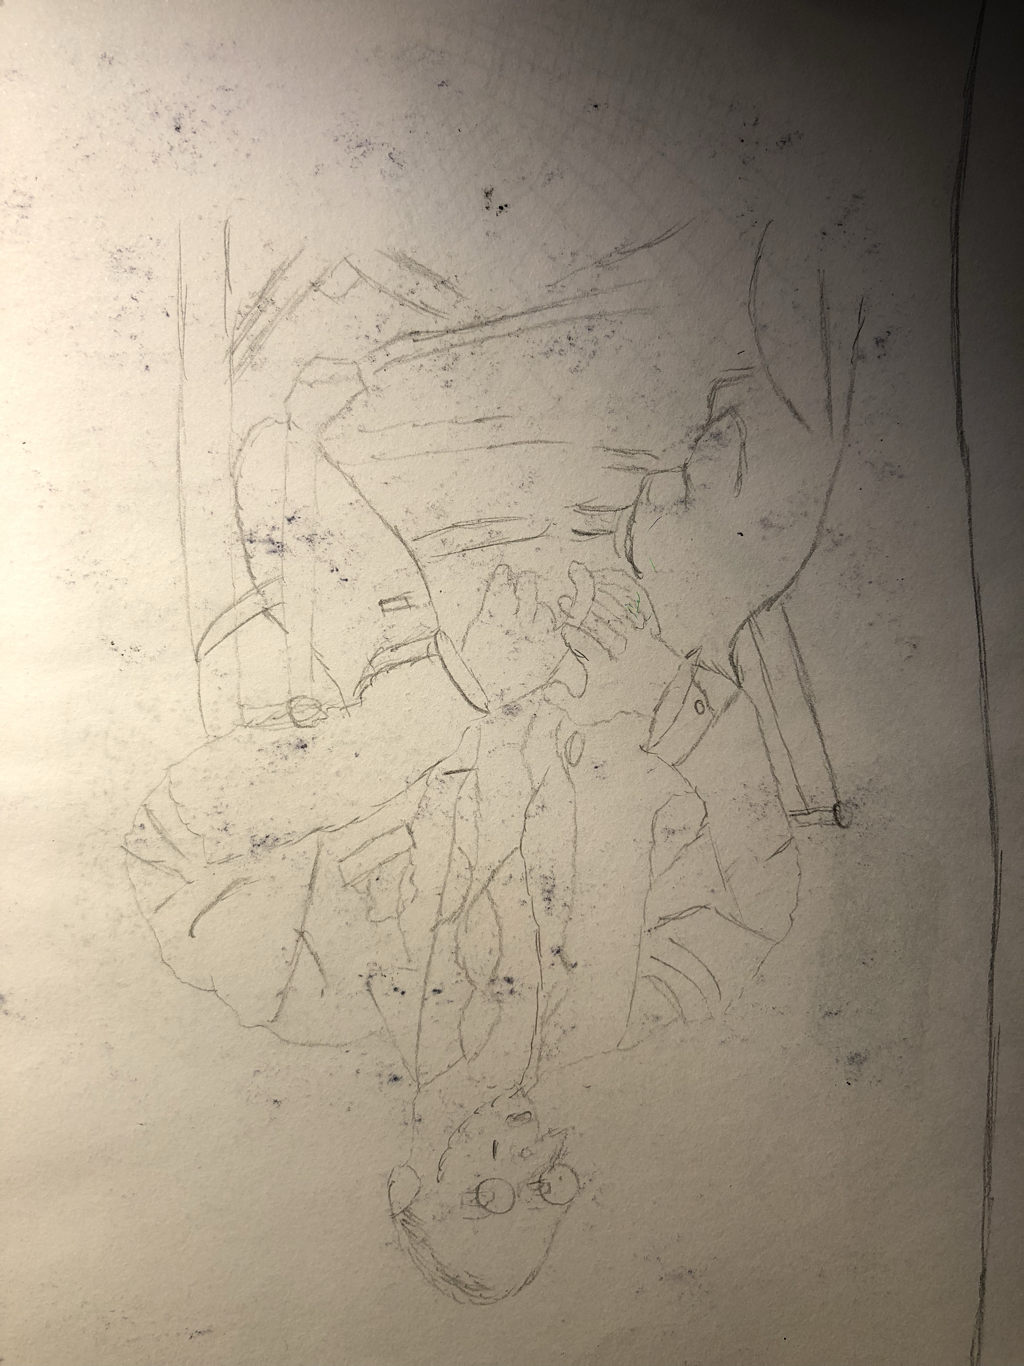
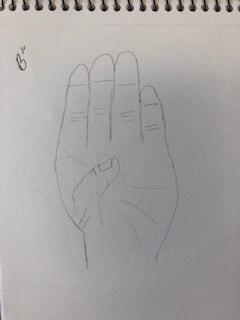
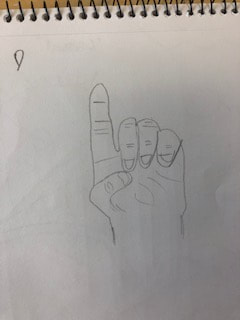
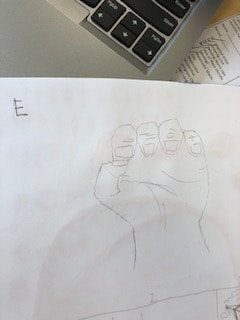
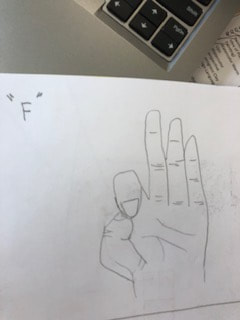
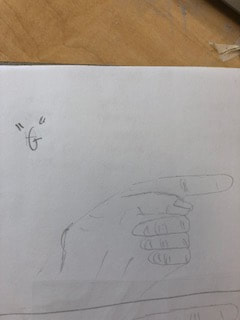
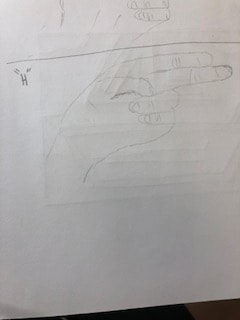
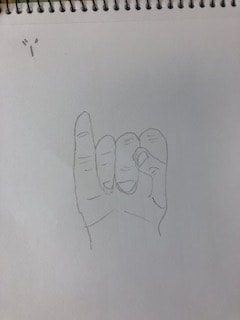
Pros- It's a very neat and creative piece. We constructed a strong string that would not break. cons- The wheat sticks would poke you when wearing it. It takes a long to peel of the outside wheat pieces and find all the strong ones. It is also flammable. process- We would take cutters and cut pieces of wheat and create piles. From there we would peel off the outside thin leaf-like layer so we could get down to the middle strong pieces. When we had all the middle pieces peeled off and collected we would stick them together and tape the pieces in groups. While doing this we used the string and added sticks along the part that we would be taping on so its stronger and wouldn't be so heavy on the string. The final part was taping all the groups of sticks onto the string. 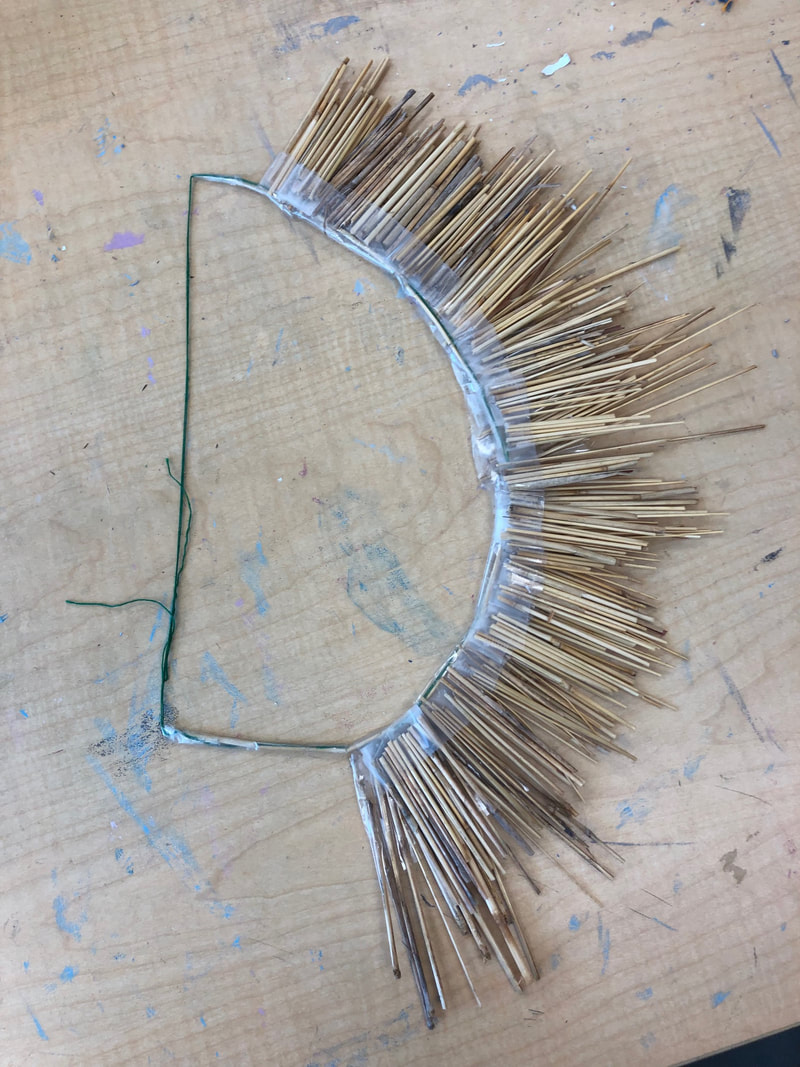 1) Describe the artwork: List what you see in the artwork. What images do you see? How would you describe it over the phone. Which art elements? Describe the color schemes. Analyze the artwork: List art elements and design principles. Color, value, line, shape/form, texture space, Balance, Emphasis, Harmony, Variety, Movement/Rhythm, Proportion. Interpret the artwork: What is the mood? What feeling is communicated? What ideas are represented? What is the story being told? Judge the artwork: What do you think of the artwork? Is it successful? Why or why not? Support your opinions with evidence or criteria. (Art skills, meaning, creative, realistic) 2) This is a pencil drawing of my lacrosse helmet. It includes different shades and different values of pencil on the helmet. Within the helmet you can see the details behind each part that makes up the helmet such as the chin strap and the Apex symbol. It took me a while to shade the majority of the helmet and create the parts where the light was coming from. The elements of lines and value are included in the image. The feeling trying to be communicated is that I like to play lacrosse and I took a long time to complete this image. The story behind this is that hard work pays off and if you put in the time you can do whatever you want. 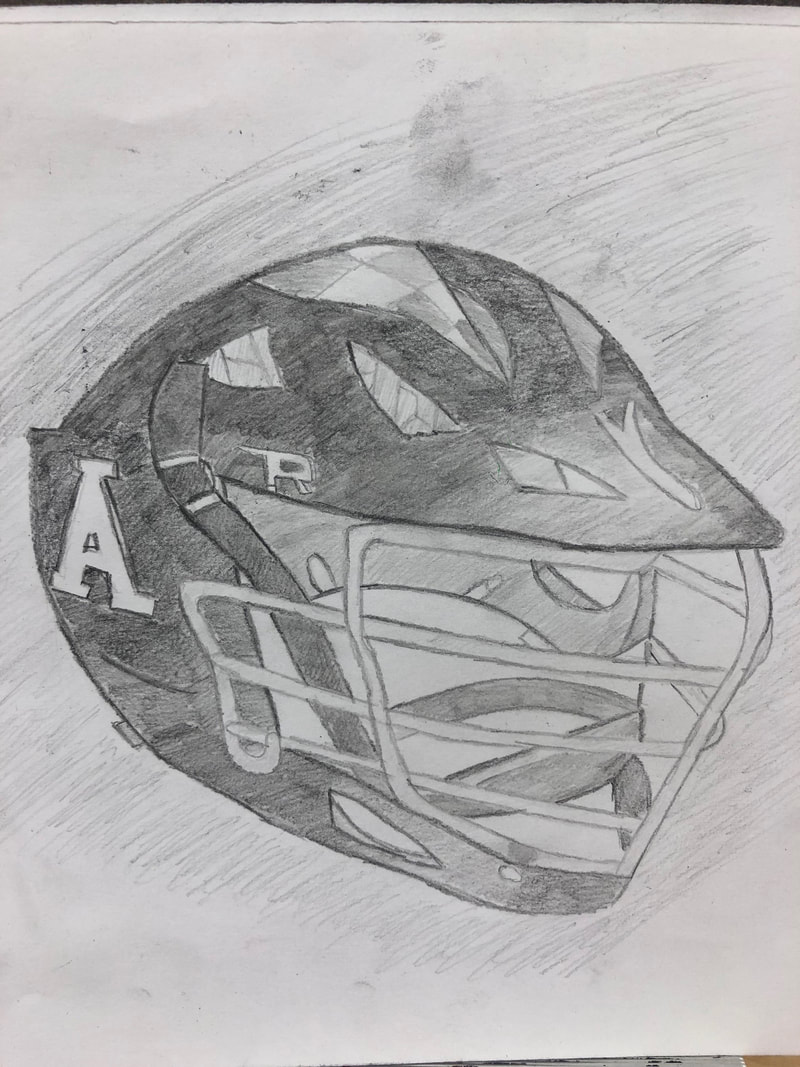 uestion 9: What was the warm up or sketchbook assignment that you learned the most from? The warm ups where we had to draw sign language where we wrote out the alphabet was the best. I learned more about how to use sign language and it made me a better artist when using pencils. Throughout the year you could see the difference in detail and time it took to create each hand sign. My only hope was that I hoped we could of finished the entire alphabet of letters. 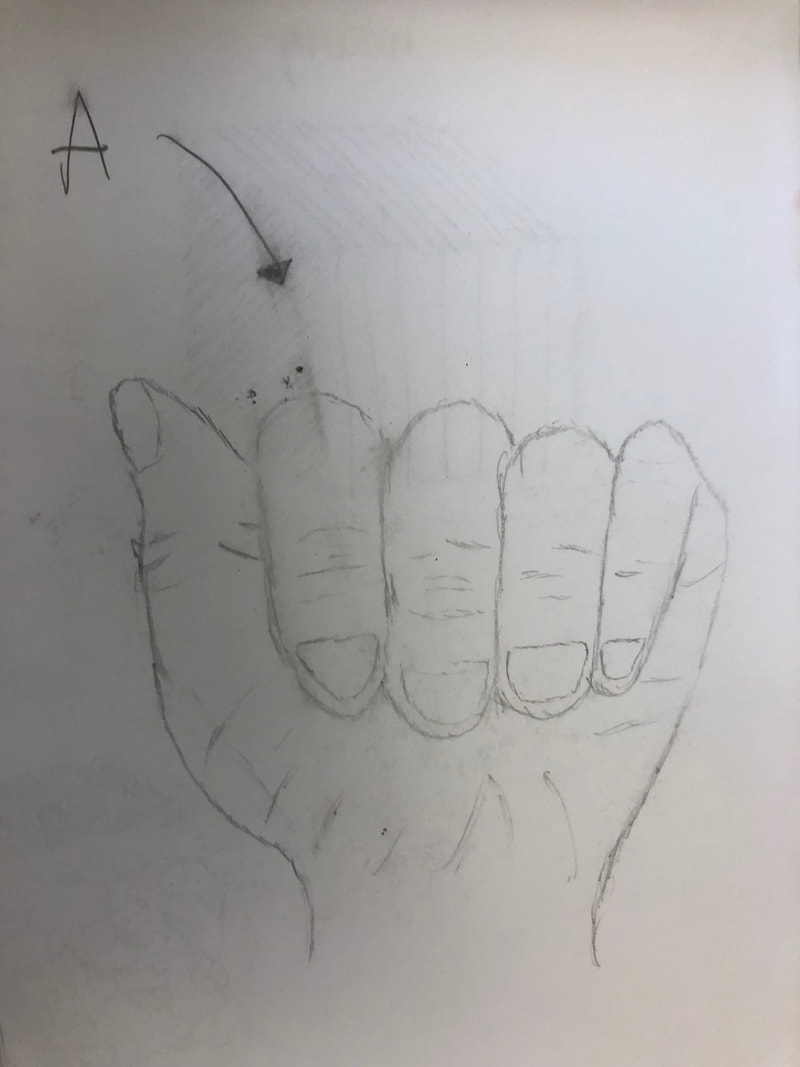 Question 4: What are some reasons why artists make art? There are many reasons for why artists make art. One reason is that artist was to inspire the younger generation the beauty of art and hope to create more talented artists. Artists have a wide creative imagination and creating art help display their dreams and ideas. Lastly, artists create art because it's either their job or it's something they just love doing. Same reason why any other person plays their favorite sport or does their favorite activity, it's because it's something that they love to do.  Question 7: What is the point of this class? What did you get out of it? The point of this class was to teach me the beginning and basics of art and make me a better artist. From this class I learned a lot. I learned all the different ways to create art such as acrylic painting, clay, charcoal, etc. I also learned the different tools to create art such as paint brushes, needle tools, modeling tools, etc. I really enjoyed this class and inspired me to create more art. 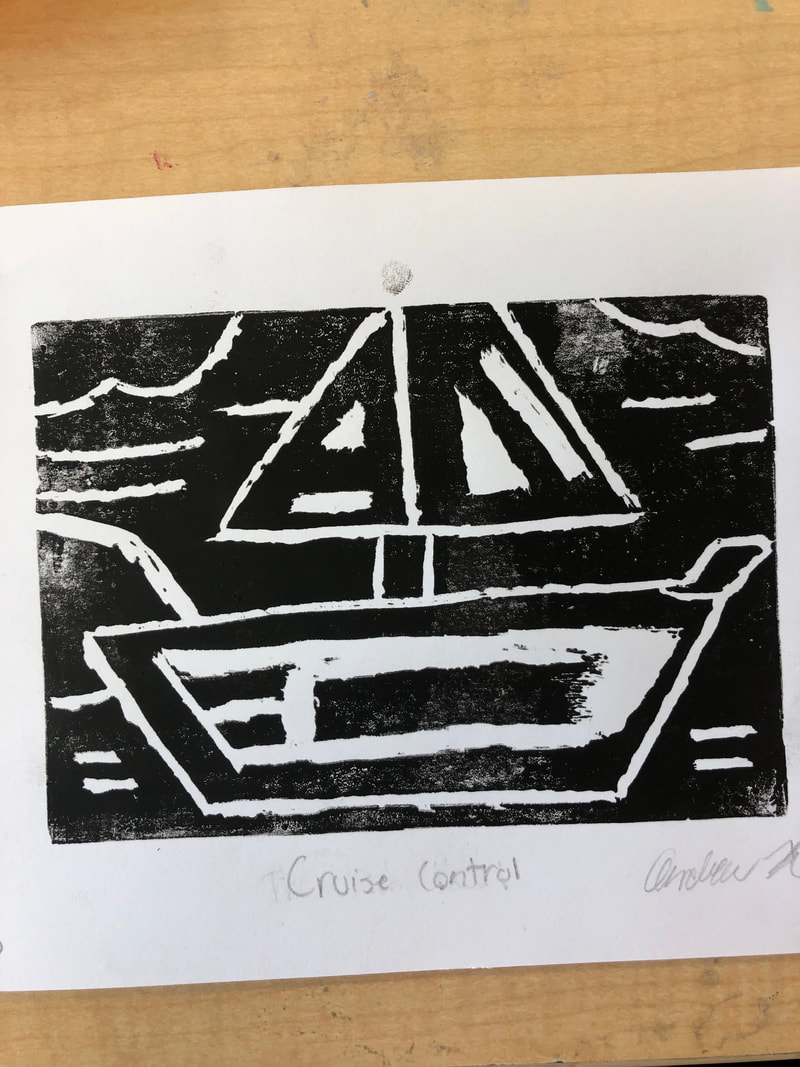 1. I used a total of 5 different techniques of my piece. I started with a layer of tissue paper of multiple colors to have a base. I then added a layer of thick packing tape to go over the tissue to create a smooth surface. I later got more scotch tape and create a border around the board to add another layer but to also keep the edges smooth. After all the tape was finished, I started using more tissue paper but used to specific colors to make my scenery. When I finished all additions of tissue paper I burned to edges that would burn the top part of the tissue to add more effect. That was my process of the techniques that I used. 2. My word was understood and I portrayed that by creating a piece that was neat and creative that the viewer would be able to enjoy and understand what it was. 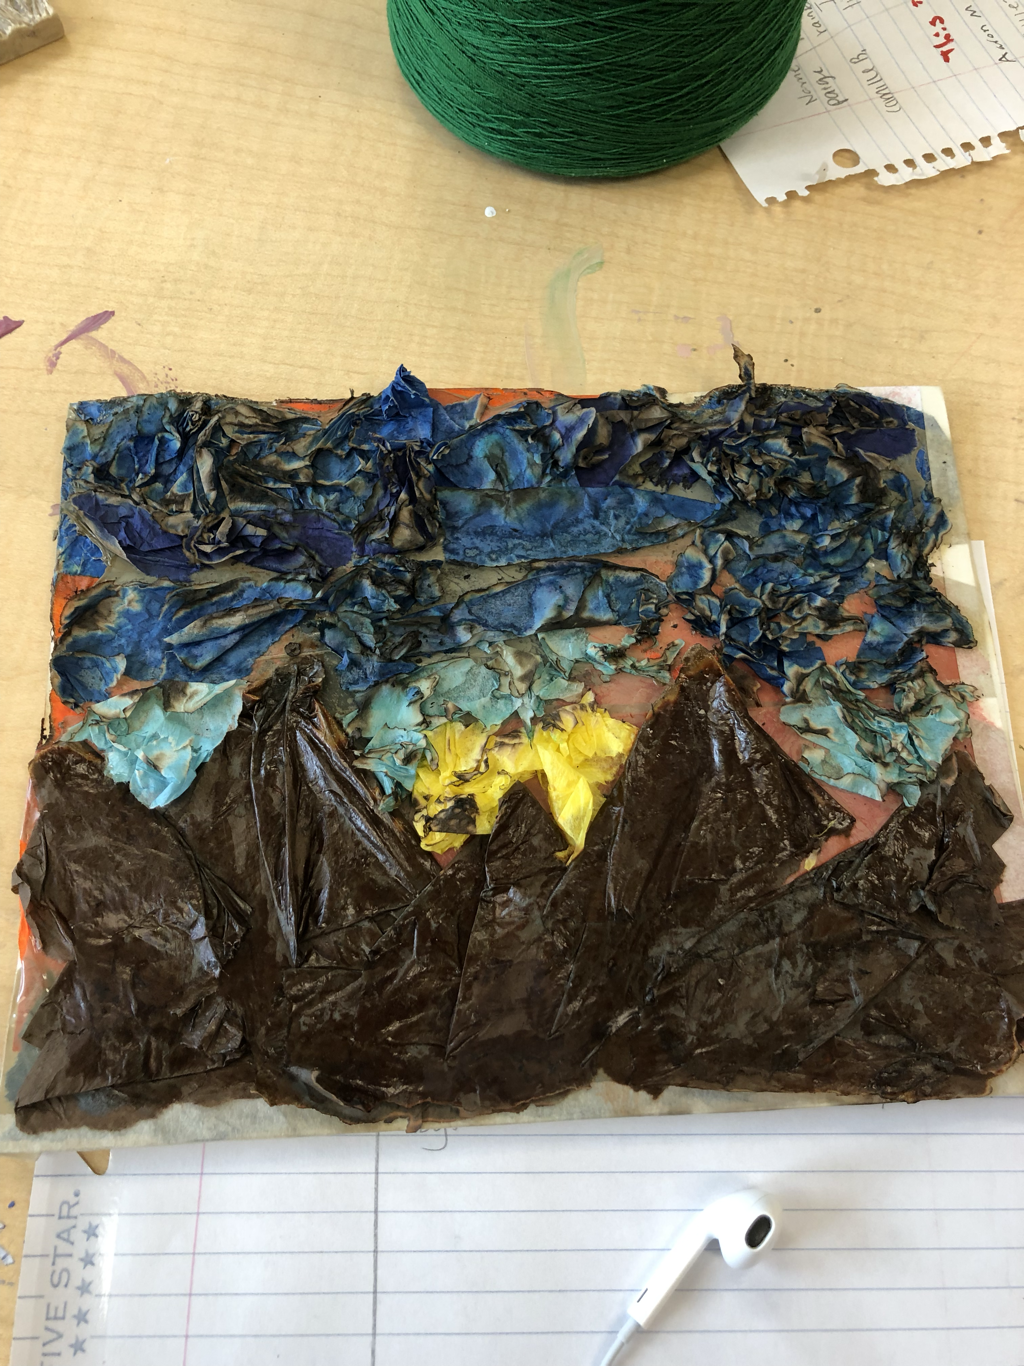 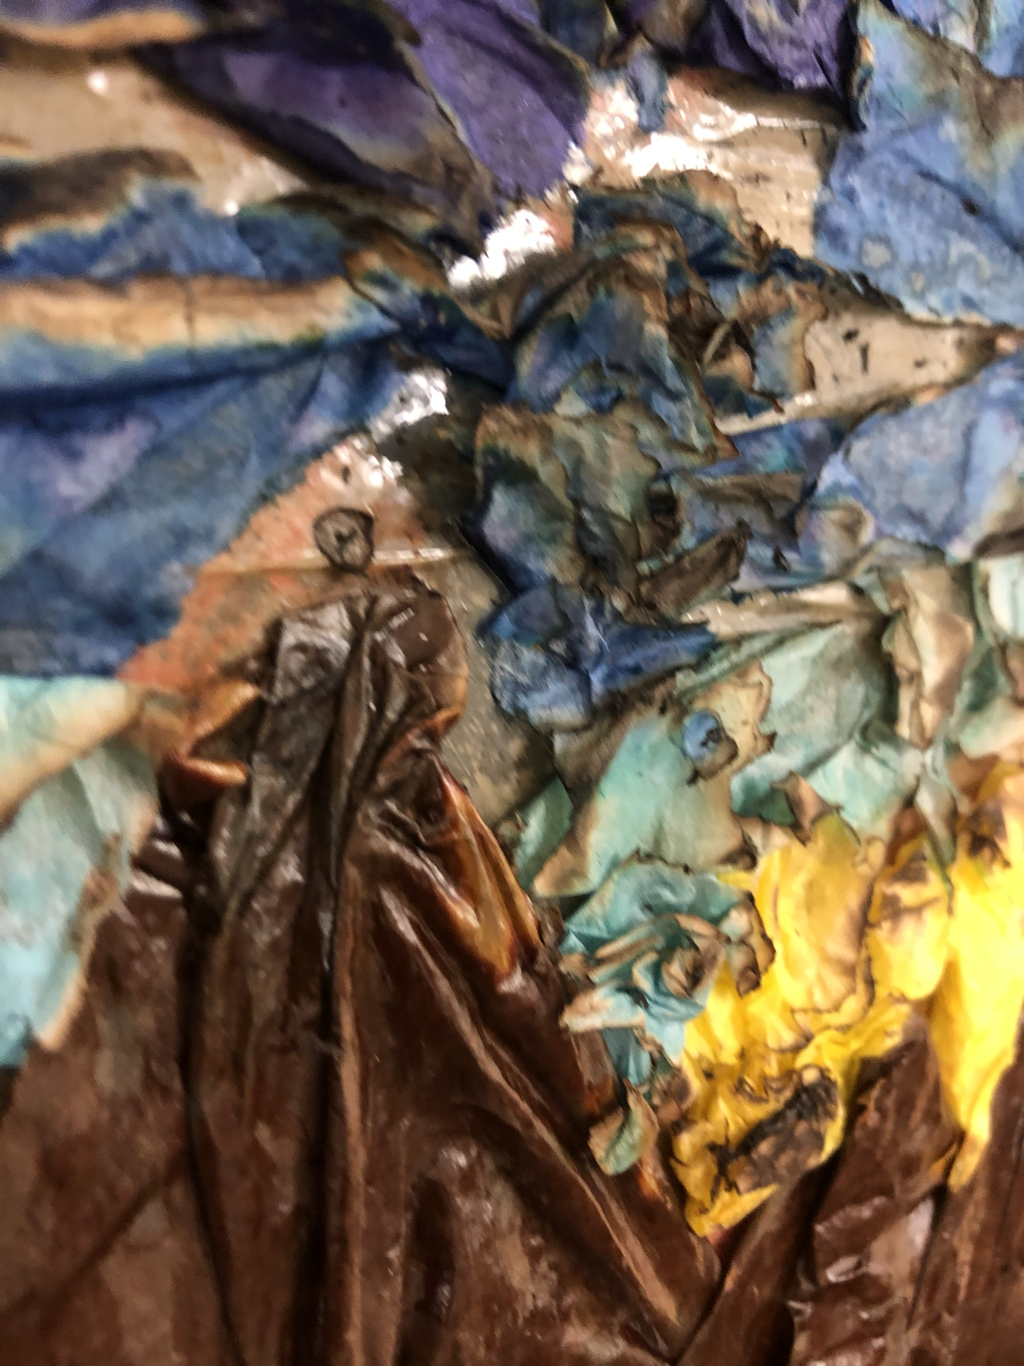 1. I did my portrait of my friend Jacob from middle school. He was my best friend and loved hanging out with him everyday. 2. The medium that I used for my portrait was a drawing pencil. 3. I started with drawing the outline of the face and the shoulders and with the easier facial features. Then I got into the harder parts that required more detail and finished with adding value to the face and body. 4. I found that I was successful with adding value to the face and the upper body. If I could do it again I would work better on the little face features like the ears and mouth and learn more of how to perfect it. 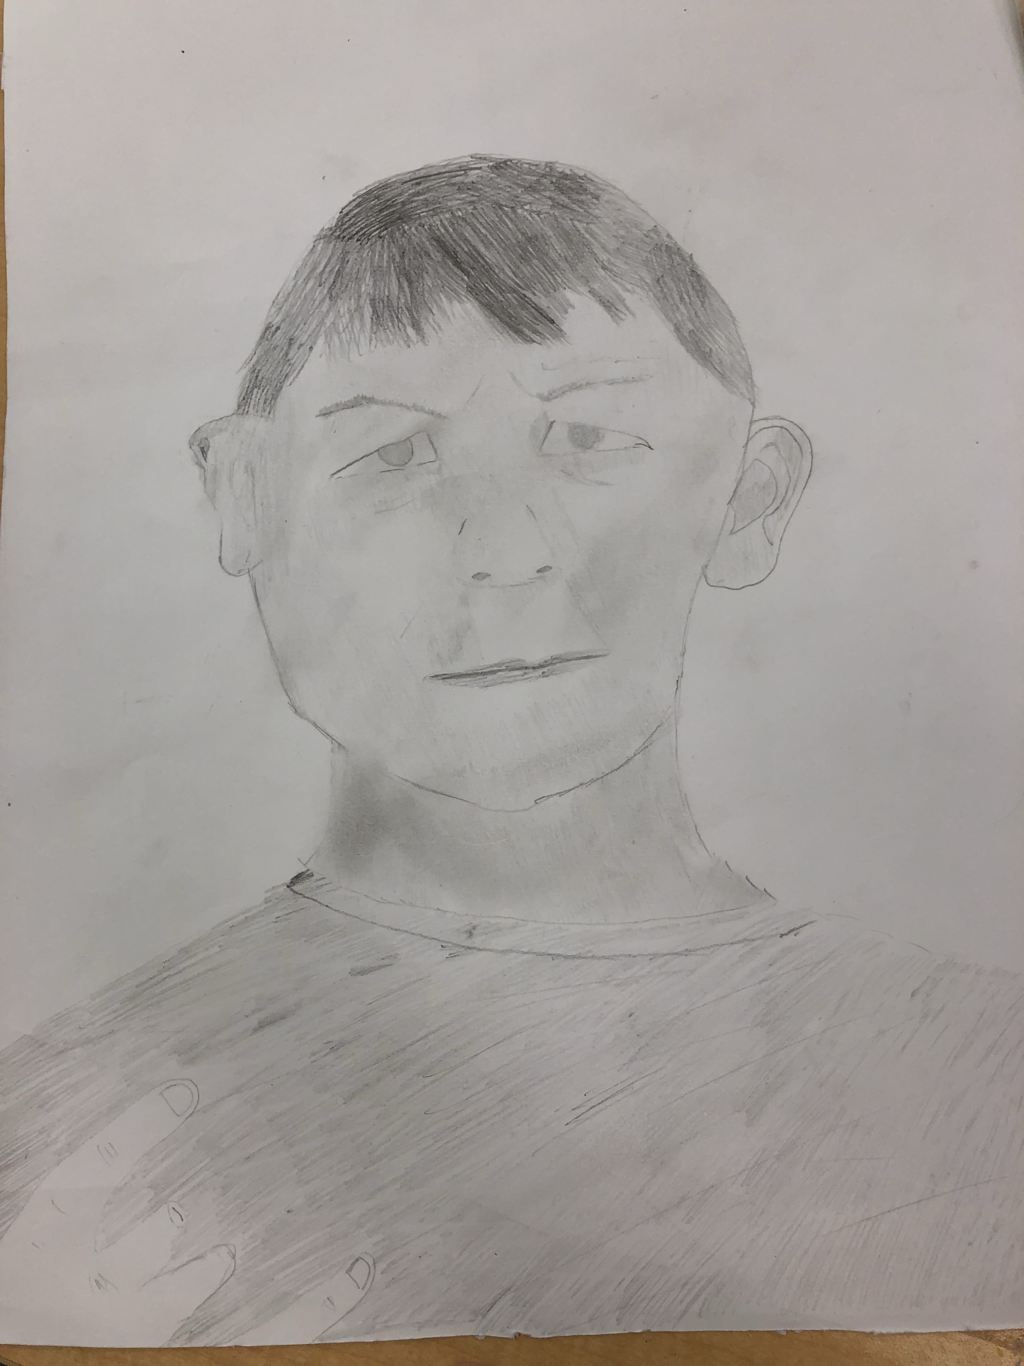 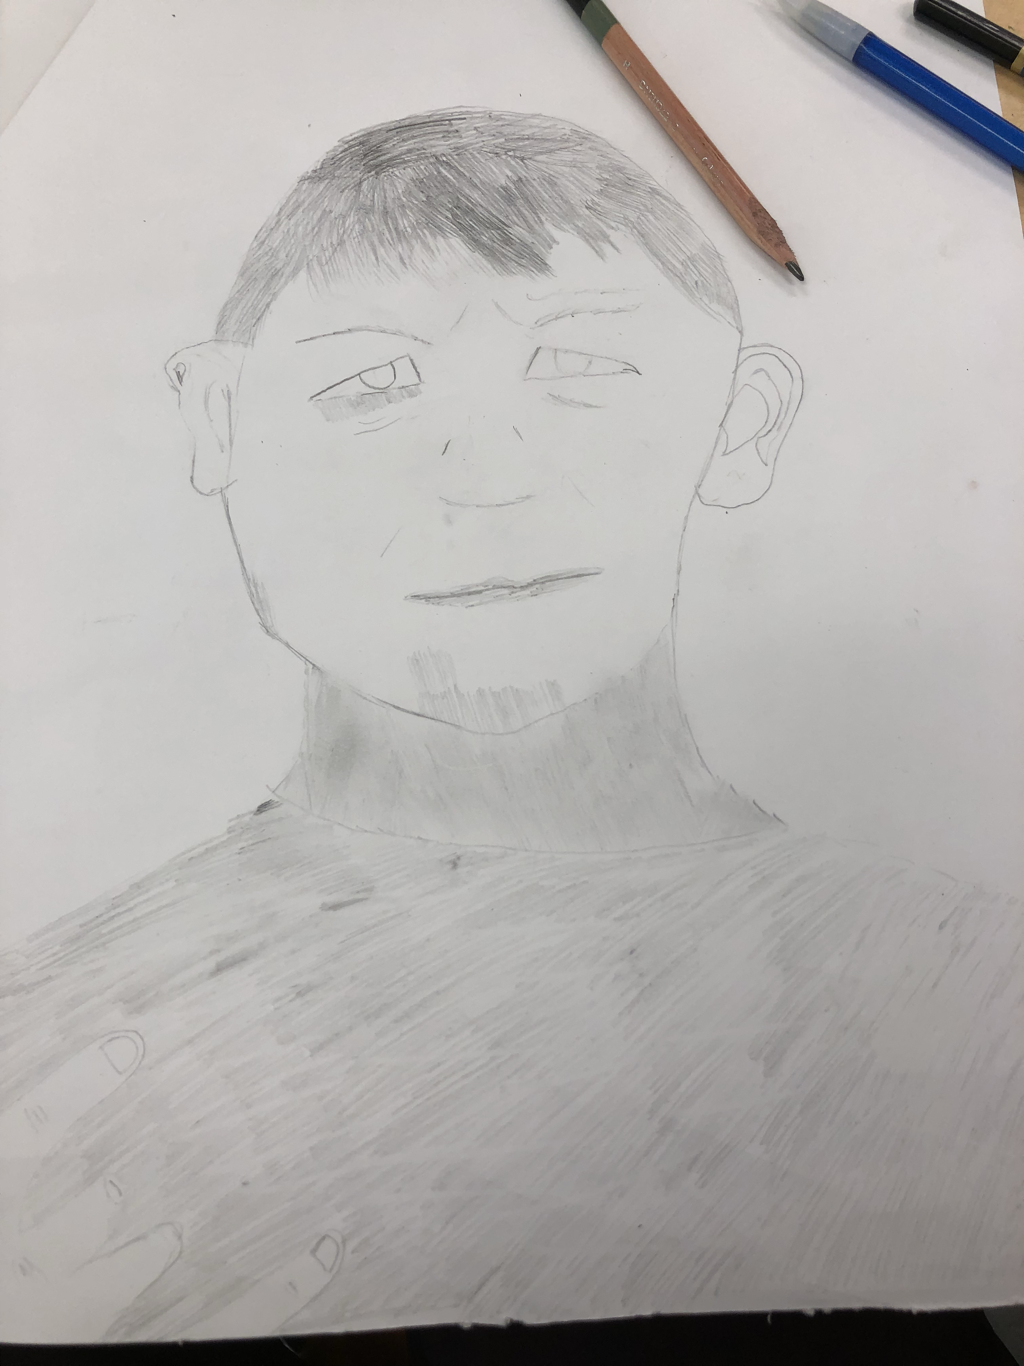 1. I believe that the eye and ear warm-up was the most helpful for my piece. I find it most helpful because for me, it was hard to draw those face features the correct way and learning the proper way make my piece better. 2. What I found most surprising about facial proportions is that it takes a lot of practice and time to get it done right. For my piece, it took a while it perfect it and make it right. 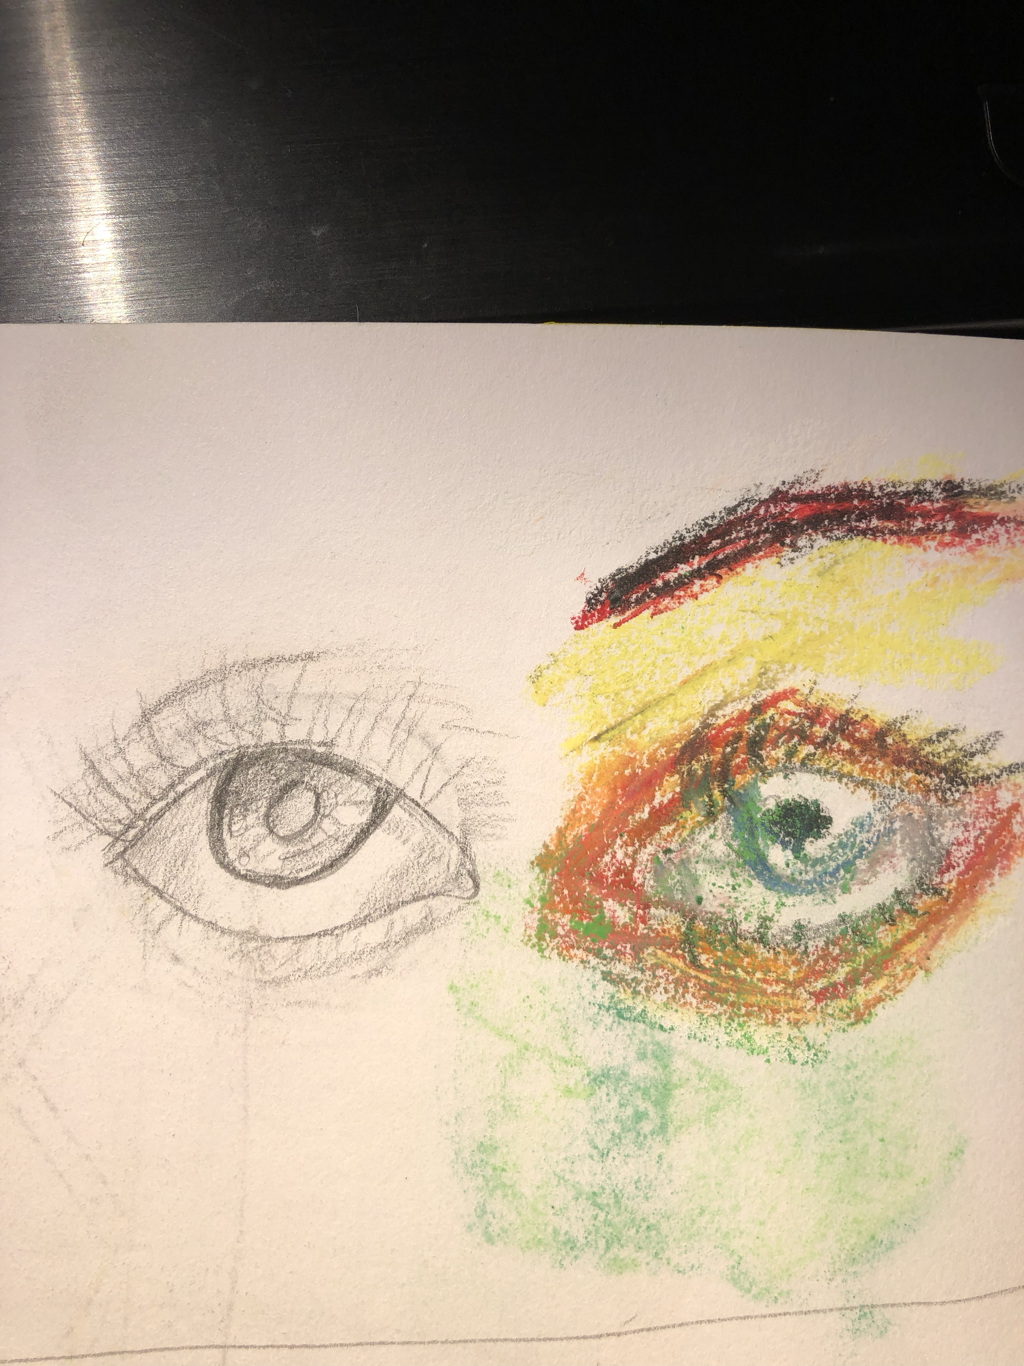  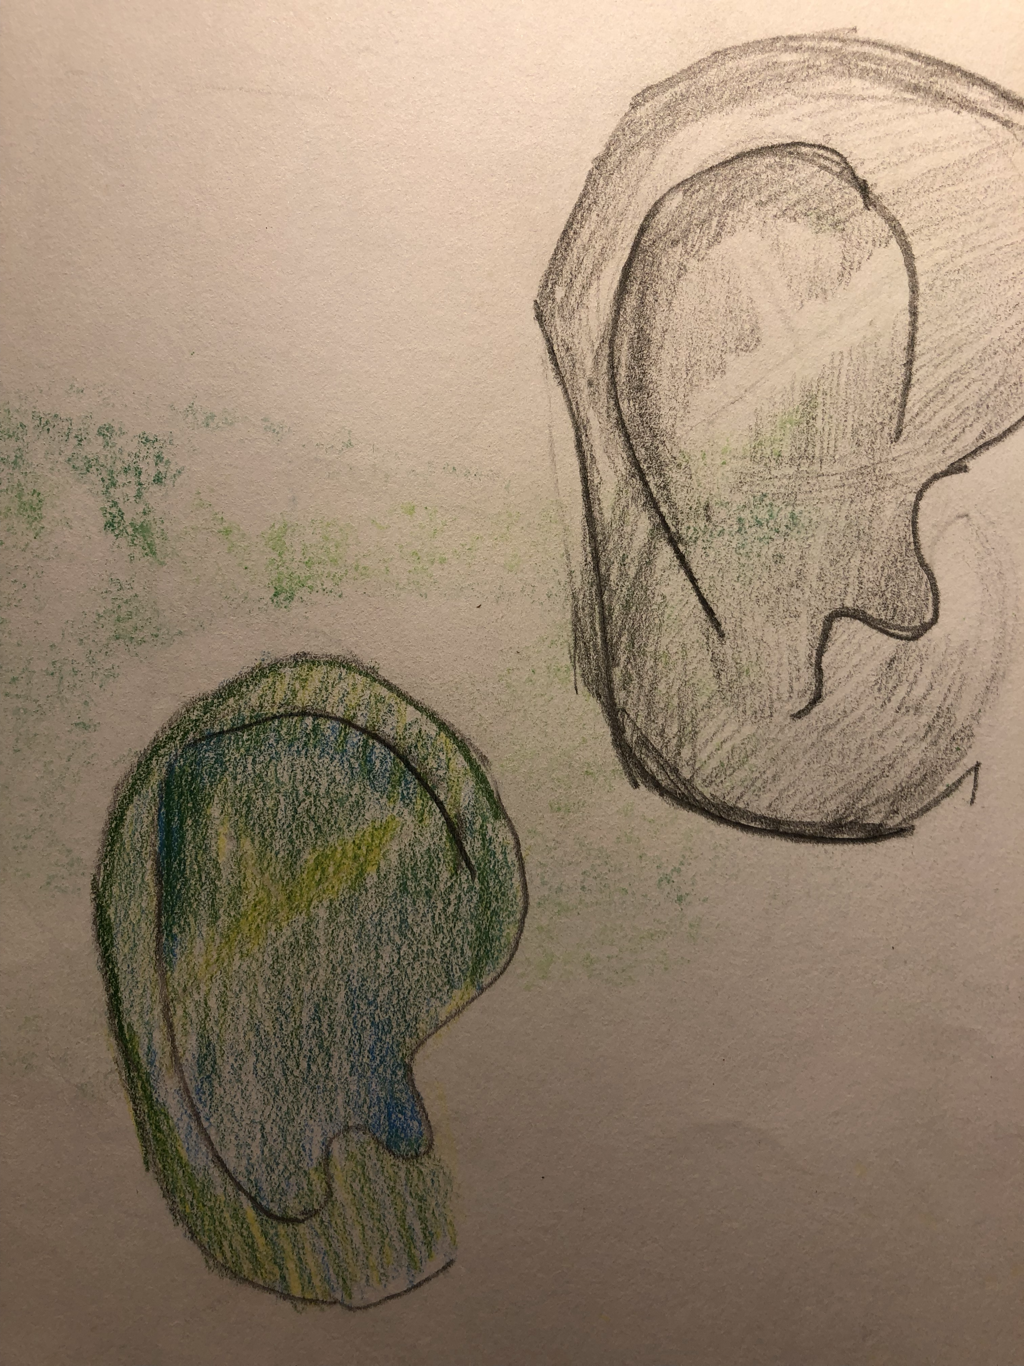 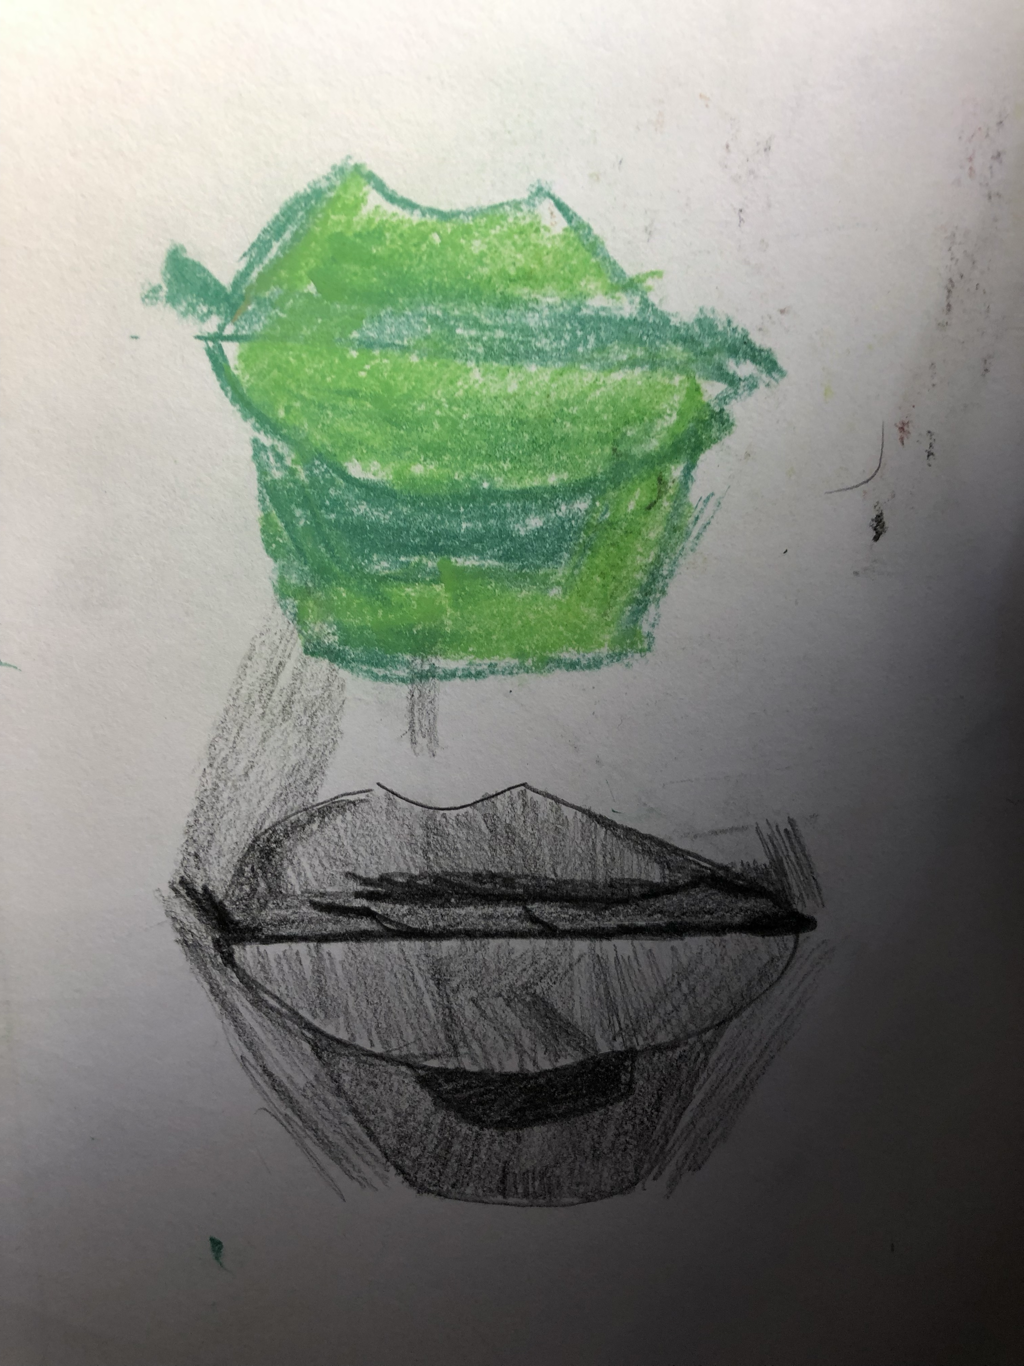      1. Since the last post I had glazed and painted my rocket. After that part I had put it in the fire to officially make it finished. 2. The successful part of my piece is that all the colors came out very nice, where they were all shiny and bold that catches the viewers attention. 3. If I could change my project I would take more time to make the top and the body part of the rocket more smooth with less cracks and creases. That the more would look cleaner and have a better texture. 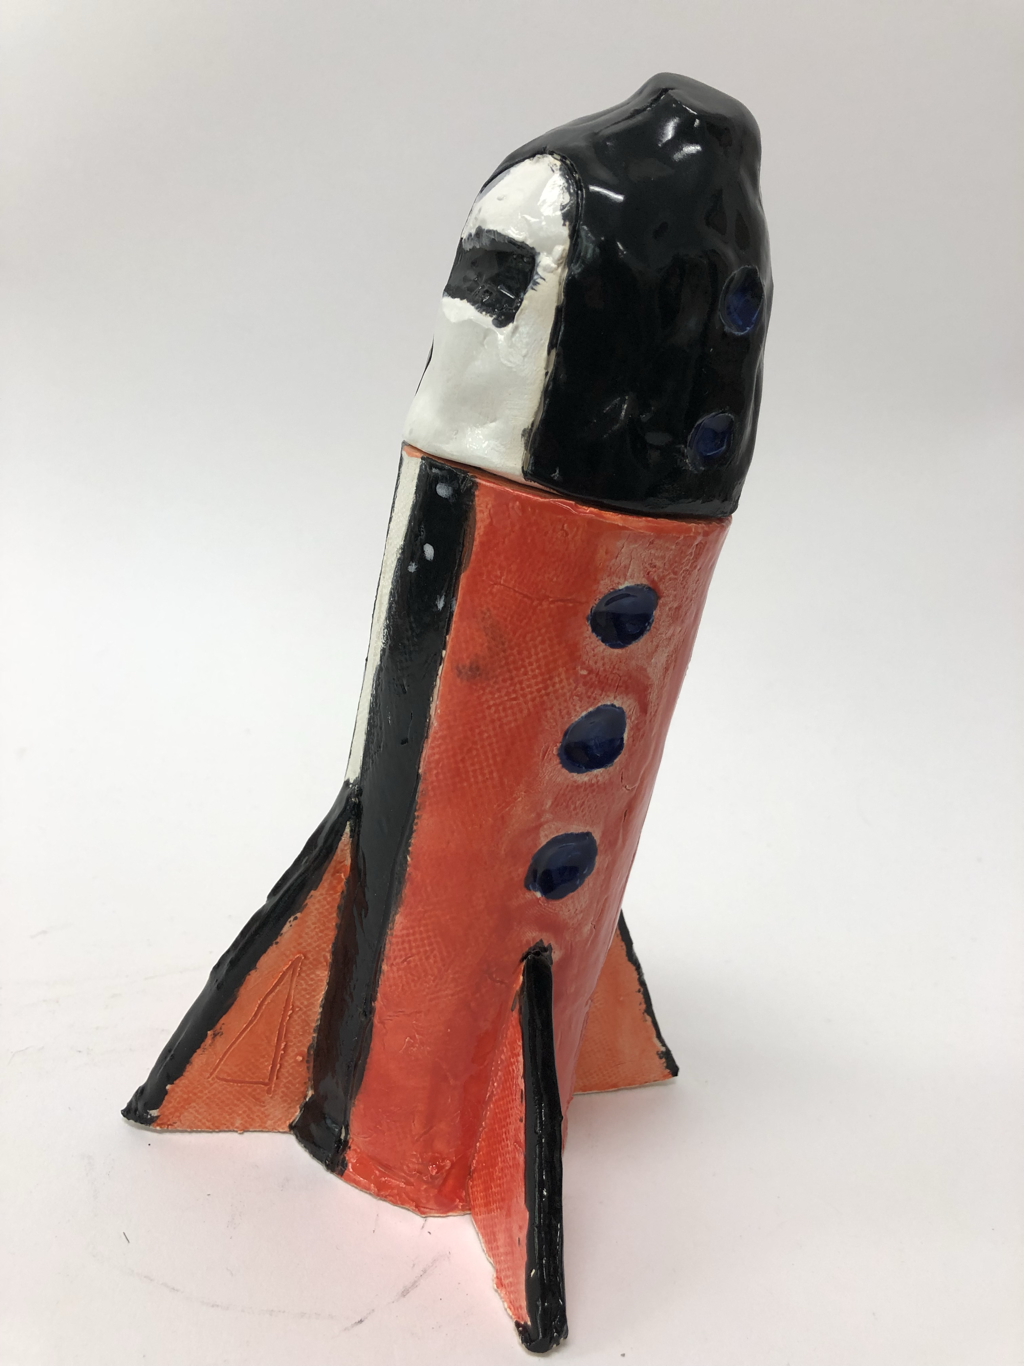  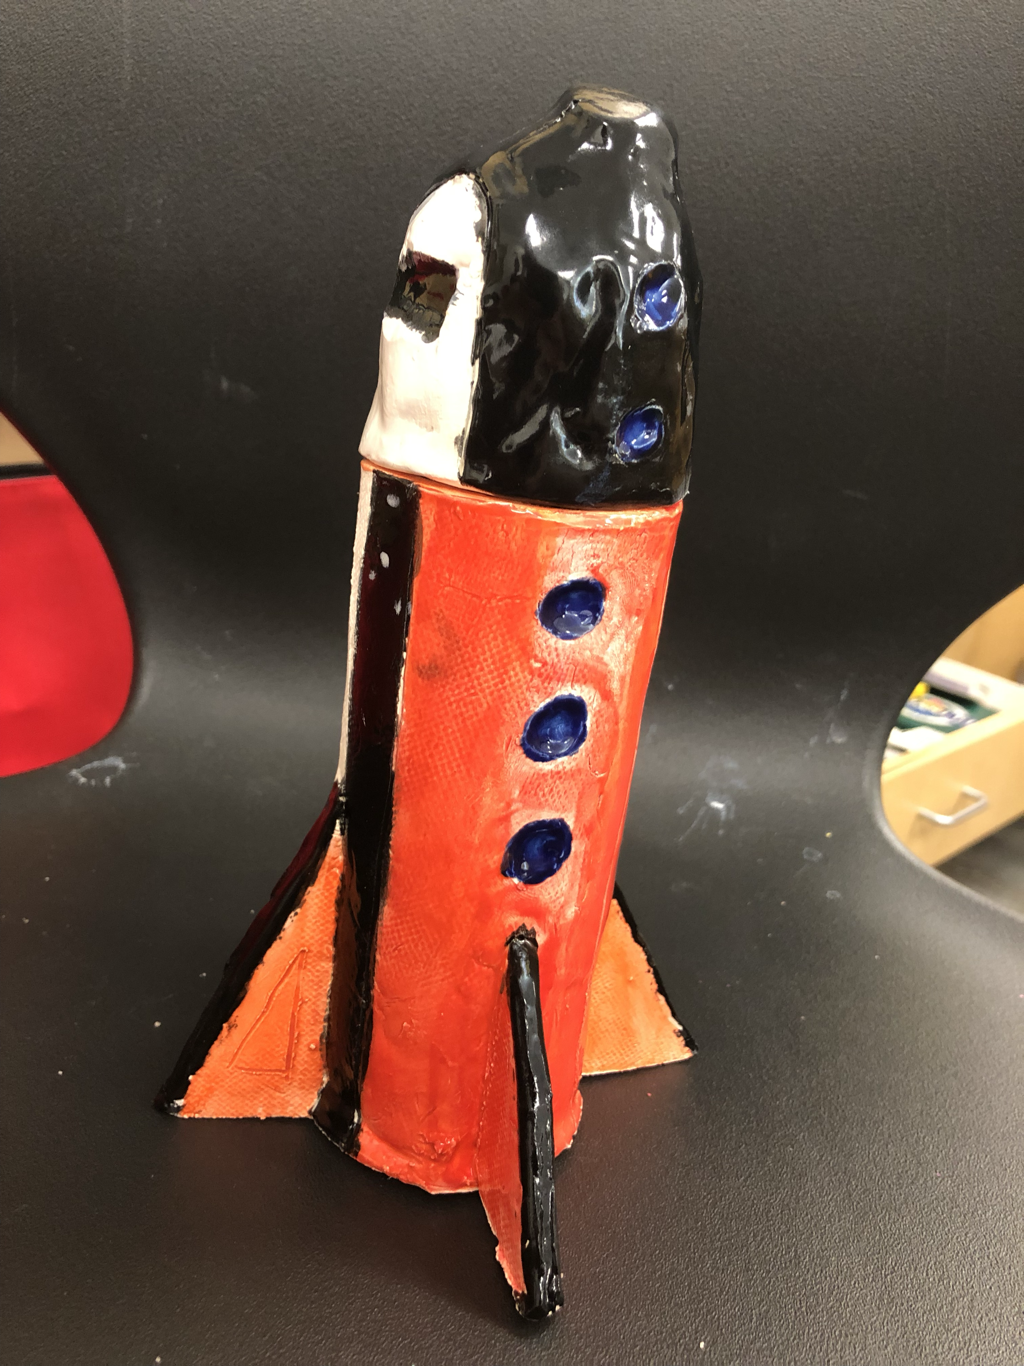 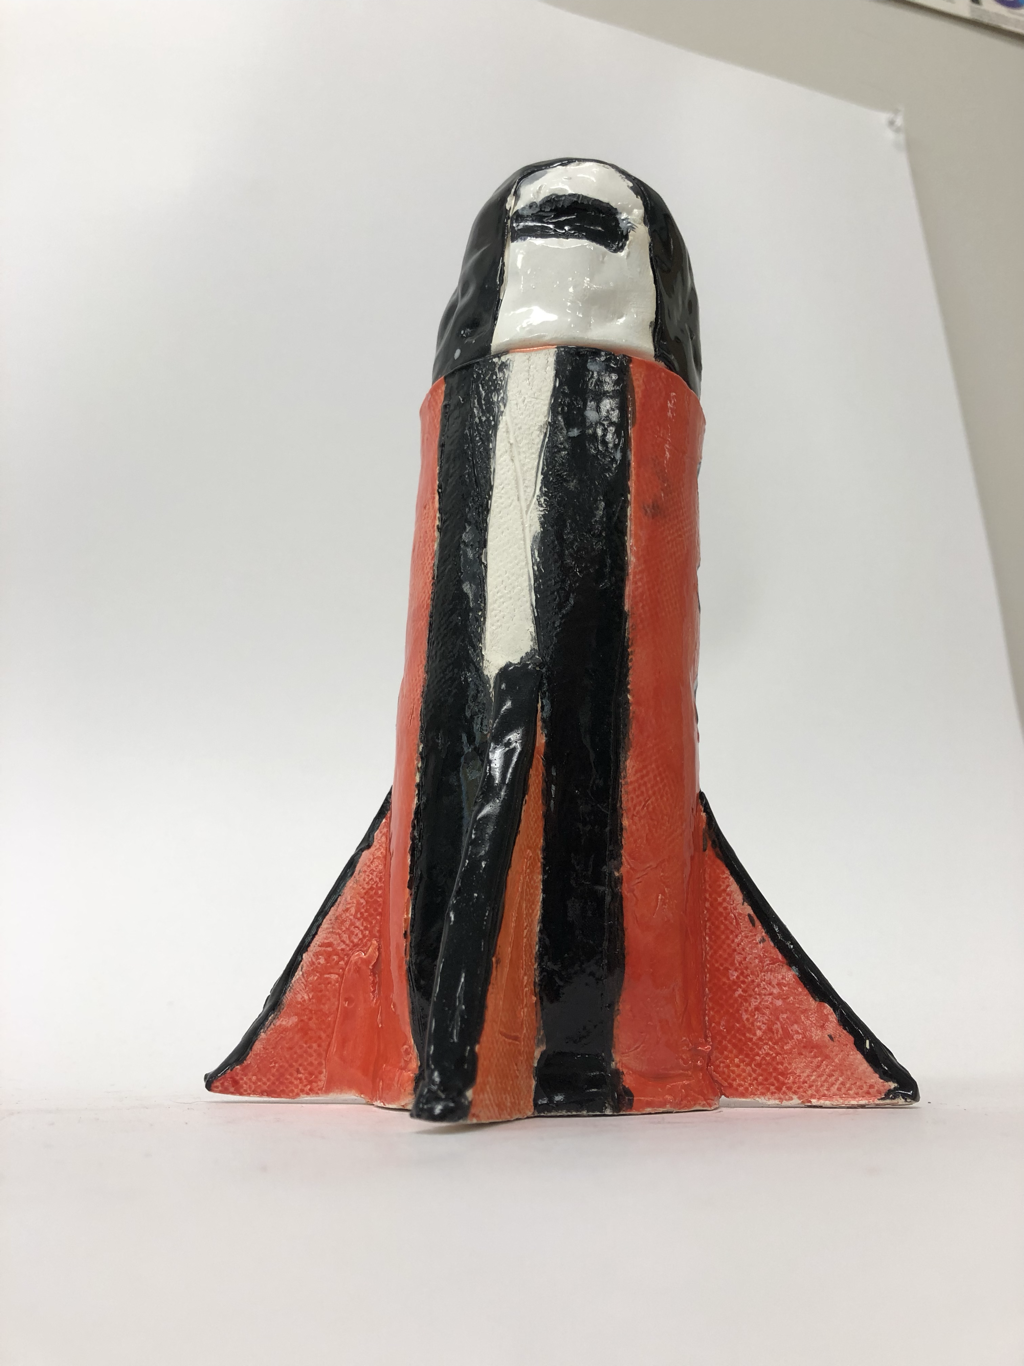 1. My piece shows the theme of lines because of I made a detailed boat from just carving out lines. Lines put together made a perfect piece of art. 2. What made my piece so successful was that I was to keep my piece nice and simple where there wasn't to much going on and it you could tell what it was. What I might change for next time is add some more lines or create and scenic background that fit well with the boat. 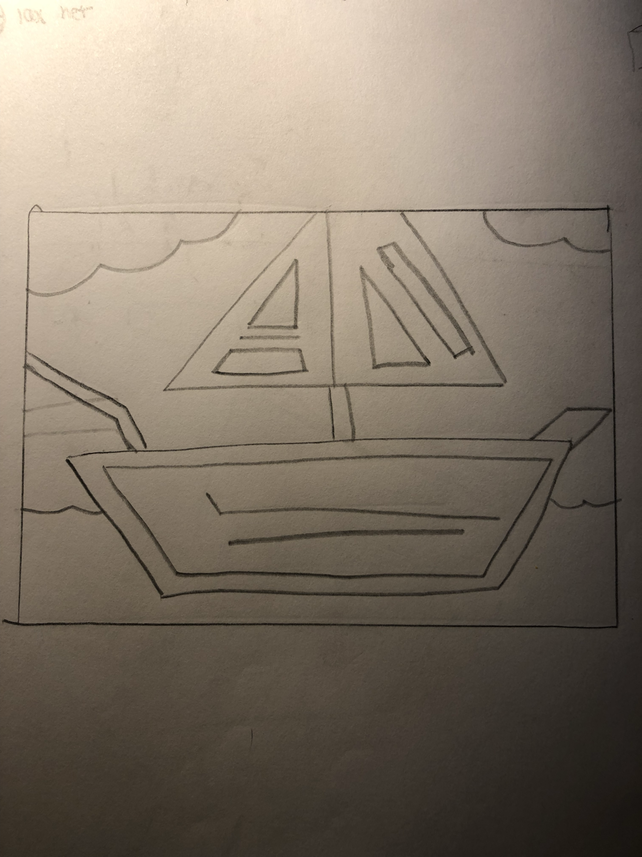  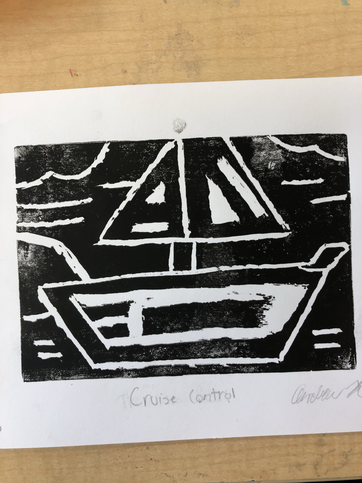 1. I plan to glaze my piece and make it colorful. When it's more colorful, it will grab the viewer's attention and look better in my house. It will also make it more realistic. 2. Things that I found most difficult was making the top piece of my rocket ship. It was challenging to get the right shape around and to make it smooth. 3. what has been successful so far is that I was able to keep everything tact and nothing has fallen apart yet. 4. I started by slabbing together clay to create a rectangle that eventually created my main center tube. Then for the top part I used the pinch pot method to get the right shape. And at the end I used a pencil to include all the little details on the side. 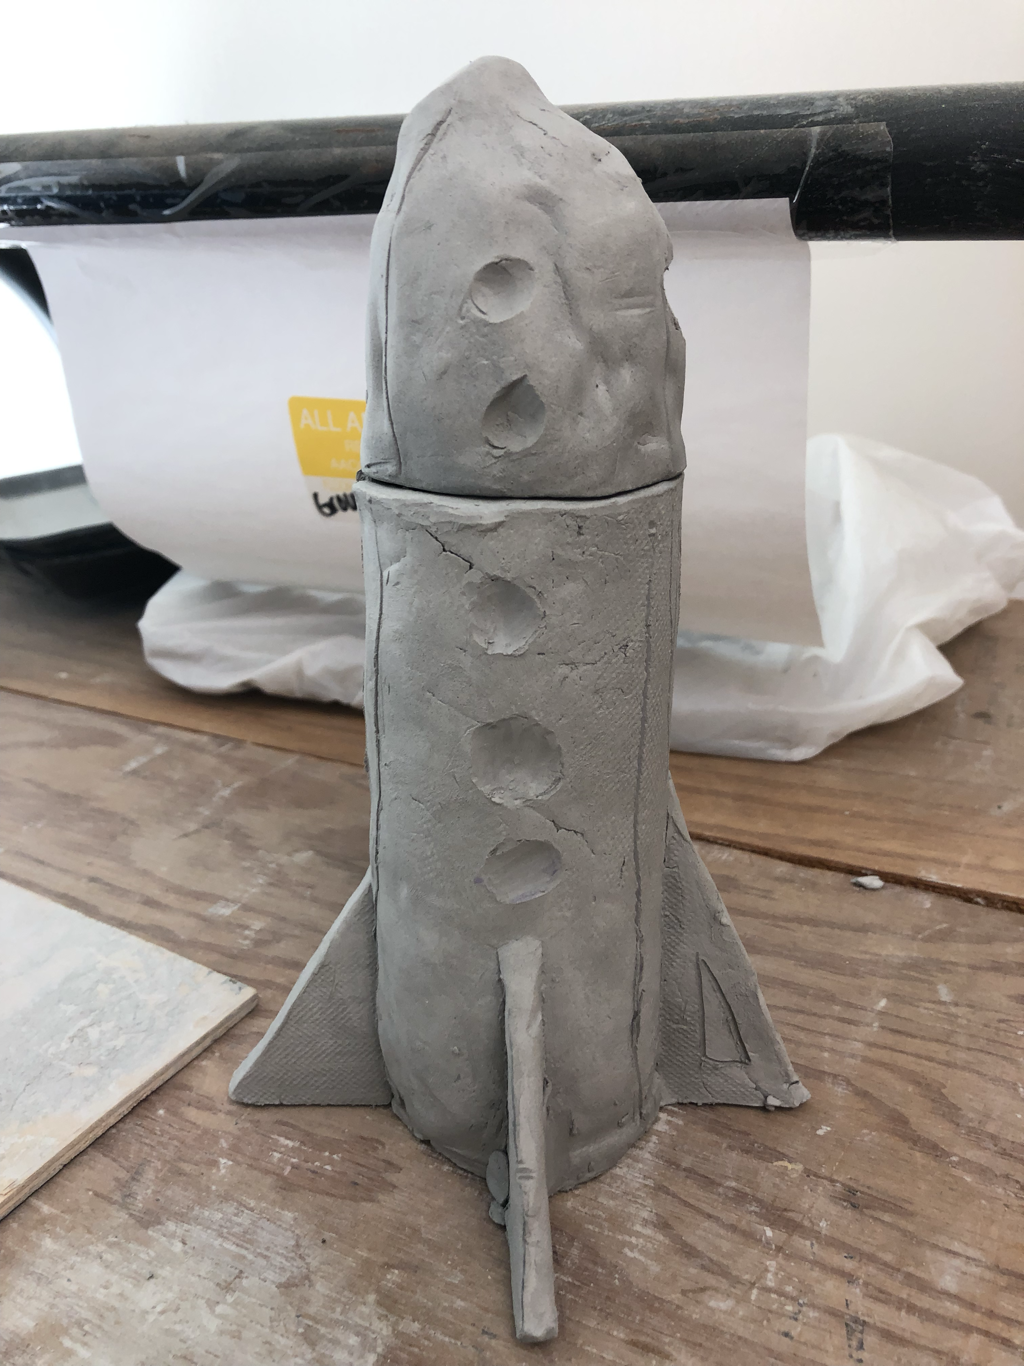 |
AuthorWrite something about yourself. No need to be fancy, just an overview. Archives
May 2019
Categories |


 RSS Feed
